It’s quick and easy to add an event, however there are a couple of things to check before you start a new listing.
You will need to be logged in to your Meets & Rallies account. If you do not have an account, you can register for free and only takes 2 minutes. This support page can help you get started.
An Event listing needs to be assigned to a club or group, so you will need to make sure that your club or group exists on the system. If you have already created your club or group listing, you can proceed on to the following steps. If you haven’t created a club or group listing, you will need to check to see if it already exists, which you can do here or view the “Add a Club/Group” page on how to create a listing.
Step 1
Once logged in to your account, click on red “+ Add New” button found at the top right hand corner of the page. On mobile devices, this will just be a red button labelled with a “+” sign.
Step 2
On the Create a Listing page, click on “Add an Event” button.
Step 3
Complete the fields on the Event Details page with the relevant information. Most fields are self explanatory however here’s a couple of points worth noting.
Governing Club – If your club or group is part of a national club, such as The Camping & Caravanning Club, this is where you’d select the overarching club. This has an impact on how your event listing is shown. If your club or group doesn’t have a Governing Club, this field can be left bank.
Hosting Club/Group – Remember that club or group you created or searched for earlier? it should appear in this list. Selecting your club or group here, links this event to the club or group, forming a two-way connection. This field is mandatory.
Location – This field uses Google Maps to find a location. If the address doesn’t appear when typing, you can use the “Pick the location manually?” option to place a pin on the map.
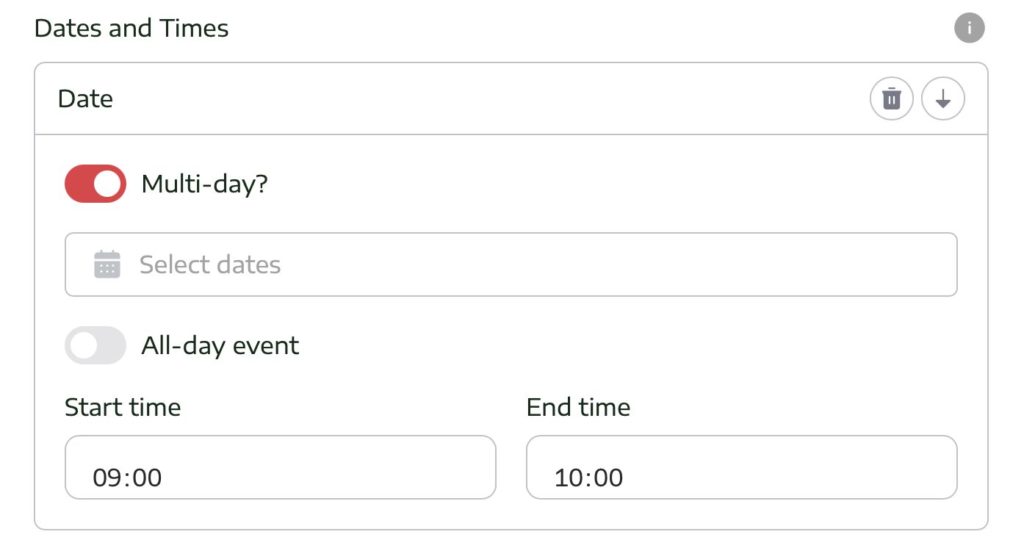
Date and Times – Most events span over one day, so make sure you check the “Multi-day?” option, shown in the image below, allowing you to enter a start date and an end date.
Once you have completed the relevant field, click “Next step”.
If any mandatory fields are left blank, or there is some incorrect information entered, you will be prompted to update the particular field before moving on.
Step 4
On the Prices and Facilities page, complete the fields with the relevant information about your event. Again, there are a few fields which are worth pointing out.
Select Your Pricing Style – Some events have different types of pricing structures and this field is used to determine how your event pricing is displayed on the listing. For example, select “Per Stay” if you event has a single price for a weekend, or a week.
Advertised Price – This field is used to display the price of your event on the event listing. This is the figure you would like to show/advertise. Using the example above, if a weekend event is priced at £24 for the two nights, enter “24.00” in to this field. If the event is charged on a per night basis (and you selected this in the pricing style field), enter the price per night.
Fees To Be Confirmed (TBC) – Checking this option removes the pricing from the event listing and shows “Fees to be confirmed” in its place. Useful if you have the event planned, but haven’t released the costs.
Equivalent Price Per Night – This field is NOT shown on your event listing. This field is only used for filters, allowing the user to search events on per night prices. Using the previous example, if you’re charging £24 for the two-night weekend, you would enter “12.00” in this field. If you’re charging per night, you would enter your nightly price as before.
Additional Pricing Details – This is a simple text field with is shown after the price on the event listing. You can use this field for any additional information or notes about the price. For example, “Including Electric”, “For the whole weekend” or “Up to 2 adults and 2 children” etc.
Extras – You can use these text fields to add any additional cost information. For example, “Admin Fee £4”, “Additional Adults £2 per night” or “Social Fee £5 per unit, to be paid in cash” etc.
Status – Select from one of the options listed. This is displayed on your event listing and also used for filters. You can change this at any time. Event listings cannot be deleted, so if your event is no longer going ahead, change this status to the appropriate option i.e. “Cancelled” or “Postponed”.
Tick the relevant options for Accepted Accommodation, Pitch Type and Facilities. All these options are used for filtering and search results.
Once complete, click “Next step”.
Step 5
On the Contacts and Booking Information page, enter the relevant details. All these fields are optional, however we would highly recommend at least adding a link to your website or a webpage, that allows users to view this information on your clubs/groups official pages.
Once complete, click “Next step”.
Step 6
Images. Here’s your opportunity to add some pictures to your listing.
The Event Main Image is mandatory and will appear in the header of your listing. You only need one image for this section.
If you have multiple images you’d like to include, upload them to the Image Gallery section. This will show on your event listing for users to browse. This is optional.
Once complete, click “Save changes”.
Done
Your new event listing is now live. You can either view your listing, or go back and edit.
You can edit your listing at anytime by heading to your profile, found by clicking your name in the top right corner of the page and selecting “My Listings”.
If you require your event listing to be deleted, please contact us.